|
|
 Alongside my fine art work, I also have access to the fantastic resources of makespace, a workshop in the centre of Cambridge, where I have some responsibility for a pair of 60W laser cutters, and a mill. Over on one of the benches are the 3D printers, and they have become so much part of my understanding of the world that I was surprised recently to find someone deeply embedded in the tech world didn’t know much about 3D printing at all. It’s not in any way my expertise, but I’ve done a bit, and I know a few ways it can be done, so here’s a quick write-up of what I know about the state of 3D printing. Alongside my fine art work, I also have access to the fantastic resources of makespace, a workshop in the centre of Cambridge, where I have some responsibility for a pair of 60W laser cutters, and a mill. Over on one of the benches are the 3D printers, and they have become so much part of my understanding of the world that I was surprised recently to find someone deeply embedded in the tech world didn’t know much about 3D printing at all. It’s not in any way my expertise, but I’ve done a bit, and I know a few ways it can be done, so here’s a quick write-up of what I know about the state of 3D printing.
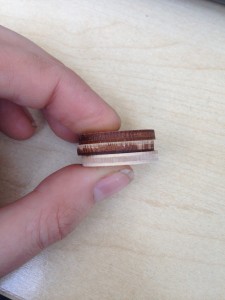
Originally, it was a form of printing, in that something that was solid was laid down in layers and allowed to dry or cool or cure. Now ‘printing’ is a bit of a misnomer, but it’s handy enough as a label. 3D printing is, at its basis, about adding stuff to a model until it’s the shape that you want it to be. This is still done in layers, to be sure one part is complete before going on to the next. That means that no matter what your method of 3D printing, you’ll have a model that takes multiple slices (often hundreds or thousands) of a model, and processes each one in turn. The picture here shows three identically sized discs. Together, they make a very short column. That’s the basics of 3D printing. Because of the fact it is additive, you can build things you cannot make on a lathe or mill, like gears that genuinely fit inside one another, or balls inside cages. Mostly, the colour is restricted by the material, so sometimes a decorative layer is added afterwards, unless the technology allows for colour placement.
The big ‘add powder’ method is laser sintering. (More widely, sintering is moulding things together below their melting point, but under heat and pressure.) It can be done by precision placement of powder, but that’s a waste of effort when you’ll generally be heating the powder anyhow, and the best way to do that is a laser. So, you can have a tray of powder, and trace a level. Then you move the tray away from the laser a little, add more powder, and melt the next layer. You can easily fuse glass or metal, and plastic is a doddle. You can create hollows in your work, because it’s supported by the powder, letting you make shapes without adding supports.
Supports are needed for other methods, because they do not have a lake of powder to sit in. Extrusion 3D printers, like the one we have at makespace, are most common for home or small-scale use. They are generally cheap, and they print by heating up plastic until it is melted, and then tracing it onto a design, like decorative icing onto a cake. Most extruders run along an X-Y set-up, although some have a funky tripod that sits around the build plate and three arms that hold the nozzle. They look like big alien heads leaning over, and it’s really cool. Either way, the stickiness of the plastic glues it to the last layer and keeps the filament intact as you extrude. You get your choice of plastics from the range that the nozzles can handle, but finding one that prints in anything but plastic means building your own. The plus side is the price tag, which allows a home user to make arbitrary shapes on a budget. You can have more than one mozzle on a machine, for different colours, but that can make the printing fail, if it is badly calibrated. One nozzle at a time works better on the makespace machine*. The plastic is pennies per gram, and as with all 3D printing, you can elect not to fill in the unseen parts of your shape, leaving a strong shell with a matrix inside to support it. A drawback of the method is the plastic you work with. You will undoubtedly need to print strong supports for your work as you go along, if it overhangs anything. Those then have to be cleaned off, and the end result will have the lines of each layer in, no matter how fine your layers. You are also limited to plastics with a relatively low melting temperature. It is a good prototyping method, especially if you can wait around for the many hours required for a high quality print. Bring a book, but don’t worry. You’ll have money left over to buy it if you decide on extrusion printing.
I know a pair of engineers with a really cool start-up making 3D robot brains for people to print out at home. Check out Cannybots for an example of what 3D printing by extrusion can do.
Another way, and one I have never seen in action as a printer per se, is lamination. Cut very thin plates of paper or plastic (or whatever material you choose, and stick them together. This is wasteful, but for a cheap material can work well. It’s a way I use with a laser cutter and glue from time to time, but I’ve never seen a printer that does this, just heard of it. When I do it myself, I have to plan where the pieces go really carefully. I assume computers can do that better, but might have problems manipulating them afterwards. If wastage is not a problem, you can just cut straight out, and glue; some of this sort of printer uses a material that is pre-glued. As I say, that’s really not my department, and other than the method I use where I design all the slices by myself, I don’t know much about it. I’ve seen the Cannybots boys making bodies with laser cut parts as well as extrusion printing, and both work, but the limit on the laser method I have access to is the material I can get hold of. I can cut 1mm acrylic – extruders tend to start at 0.4mm and get smaller from there, and the fine corners don’t melt from excess laser heat.
The method that I have seen that I like most is stereolithography. You need a UV laser and a pool full of goo that sets when hit by a UV laser. As I recall, you can either do it so that the goo sets when the laser is focused enough to deliver enough energy, or you can use two lasers, which interfere in such a way as to deliver that energy at a given spot. Like any other method, you create in layers, on a build tray. Here the tray tends to move upwards from the surface of the goo, with the item attached, so the thing you are building grows up and out of the goo. The machines, and the material, are both more expensive than extrusion methods, but for the price of machine you get a lot more, and there tend to be fewer failures. (n=3-ish, so beware.) The limits on the printing will be to do with laser beam width, motors, and other things that are finicky at rather below the sizes extrusion can manage. You get a smoother surface, and a nicer finish, but again you are limited to the things that will develop in UV. I have seen moulds built from models which are then used to create other things, however, and the surface details were still good.
Those are the main types of printing I know of, if not know about. As far as modelling goes, there is a big, active community that creates files that you can use. For a good look at what can be created with 3D printing, take a look at the front page of Thingiverse, and the featured collections. There are commercial 3D printers who deal in individual item. The one I know about through friends having used it is Shapeways. They do good quality work at prices that are better than buying your own printer, including ceramics, precious metals, and other things. You can upload your own model there, or find pre-defined models. I’ve never felt the need to use them, but I’ve heard they produce good work, although you pay for the quality.
—
* Disclosure: Makespace has more than one machine for this. The one not in use tends to be hacked a bit, and currently has the wrong motherboard. I love makespace.
|
